Rolly G. Bueno Jr.

Design. Develop. Deliver. WordPress Excellence

Category: WordPress

  • How to Make Your WordPress Site More Secure

    In today’s digital landscape, a secure website is essential for protecting your data and maintaining your online reputation. WordPress is one of the most popular content management systems, but it can also be a target for hackers and malicious attacks. Fortunately, there are several proven strategies to enhance the security of your WordPress site. Here’s how to make your WordPress site secure:

    1. Use Strong Passwords and User Permissions

    One of the simplest yet most effective ways to secure your WordPress site is to use strong passwords and define proper user permissions:

    • Strong Passwords: Ensure every user has a unique and strong password. Use a combination of upper and lower-case letters, numbers, and special characters.
    • User Permissions: Limit user access levels based on roles. For instance, don’t give out admin access to users who do not need it.

    2. Keep WordPress Core, Themes, and Plugins Updated

    Software updates are crucial for security. Regularly updating the WordPress core, themes, and plugins helps protect your site from vulnerabilities:

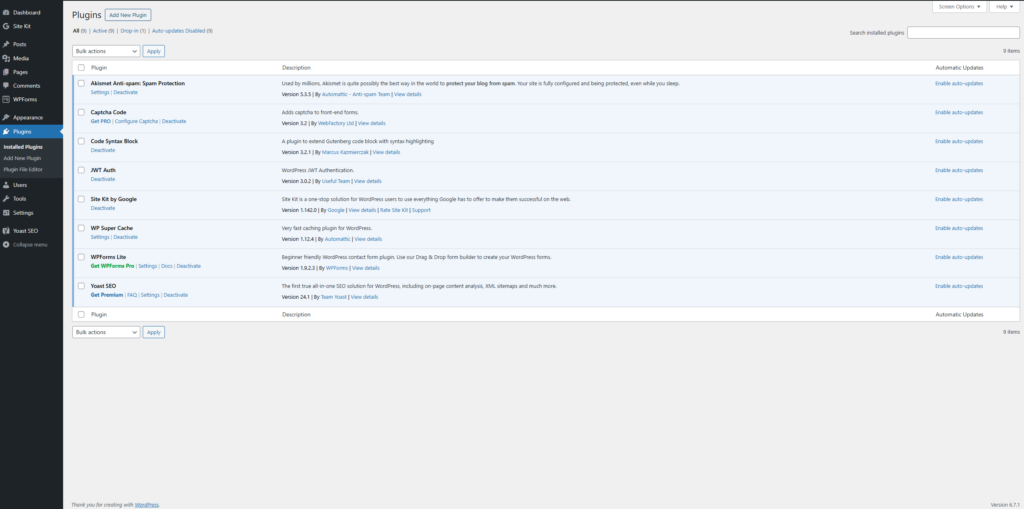
    • Updates: Enable automatic updates if available, or check for updates frequently to ensure you’re running the latest versions.
    • Delete Inactive Plugins and Themes: If you’re not using them, it’s best to remove them to reduce potential vulnerabilities.

    3. Implement a Web Application Firewall (WAF)

    A Web Application Firewall is a barrier between your website and potential threats. It filters and monitors HTTP traffic to and from your site. Consider:

    • Cloud-based WAFs: Services like Sucuri or Cloudflare offer cloud-based firewalls that can mitigate risks before they reach your site.
    • Application-level WAFs: Some security plugins include firewalls that can protect against common attacks, such as SQL injection and cross-site scripting (XSS).

    4. Use Security Plugins

    There are numerous security plugins available that can help monitor and enhance your site’s protection. Some popular ones include:

    • Wordfence Security: A complete security solution, including firewall protection and malware scanning.
    • iThemes Security: Focuses on fixing common vulnerabilities and implementing various security measures.

    5. Enable Two-Factor Authentication (2FA)

    Two-factor authentication adds an extra layer of security by requiring a second form of verification:

    • Setup: Many WordPress security plugins allow you to enable 2FA with just a few clicks.
    • Benefits: Even if a user’s password is compromised, the additional verification step can help prevent unauthorized access.

    6. Regular Backups

    In case of an attack or data loss, having a recent backup of your site is invaluable:

    • Backup Solutions: Use backup plugins like UpdraftPlus or BackupBuddy to schedule regular backups.
    • Offsite Storage: Store backups in a secure location, such as cloud storage or an external hard drive, to prevent loss in case of server failure.

    7. Implement SSL Certificates

    An SSL certificate encrypts data between your server and users. Here’s why you need it:

    • Data Protection: SSL protects sensitive data exchanged on your site, such as login details and payment information.
    • SEO Benefits: Search engines favor secure sites, which can positively impact your rankings.

    8. harden Your wp-config.php File

    Your wp-config.php file contains critical configuration settings for your WordPress site. You can enhance its security by:

    • Restricting File Permissions: Set the file permissions to read-only (440 or 400) to prevent unauthorized access.

    9. Limit Login Attempts

    Limiting login attempts can prevent brute force attacks on your site:

    • Brute Force Protection: Use plugins like Limit Login Attempts Reloaded to restrict how many times a user can try to log in.
    • Lockout Feature: After a certain number of failed attempts, you can temporarily lock the user out.

    10. Monitor Your Site for Threats

    Regularly monitor your site for threats and vulnerabilities to stay ahead of potential attackers:

    • Security Audits: Conduct periodic security audits to identify vulnerabilities.
    • Activity Logs: Use plugins that log user activity to trace any unauthorized actions.

    Conclusion

    Securing your WordPress site is an ongoing process that requires vigilance and proactive measures. By implementing the strategies outlined above, you can significantly reduce the risk of an attack and protect your data and reputation. Always stay informed about the latest security trends and practices to keep your site secure in an evolving digital landscape.

  • How to install WP CLI in Windows

    What is WP CLI?

    As part of my experience working on WordPress since 2009, which counts as more than 14 years, one of the working tools I would recommend to new WordPress developers is WP CLI.

    So what is WP CLI? It’s a command line interface that allows developer to manage their WordPress sites using command prompt, if you are using Windows or Terminal if you are using Linux.

    One of the commands that is useful(to me at least) is when I clean up thousands of spam comments without using bulk action, which is limited to 25 posts deletion per request. Not to mention that would be time-consuming. A single WP CLI command will do this once in under 1-3 seconds.

    $ wp comment delete $(wp comment list --status=spam --format=ids)

    How to install WP CLI?

    While I recommend developers use Linux-based operating systems for their workstations, some of us still find Windows as our main operating system. This tutorial will walk you through installing WP CLI on Windows.

    The first thing I would recommend is that we avoid using Windows default command prompt and instead use git-scm. Download and install https://git-scm.com/download/win first. We will use this command interface for the rest of our work.

    Second, we need to install Composer. Download Composer-Setup.exe which will give you the latest Composer version, then we need to setup Composer in our Windows PATH. This will let you use composer command from any directory. Verify if your composer installed properly by using using the following command:

    $ cd C:/
    $ C:/ composer -V

    Once you’re done, create a new directory in C:/, depending on what drive letter your Windows is using. It should be using C:/ as default but double-check your local install. Download https://raw.githubusercontent.com/wp-cli/builds/gh-pages/phar/wp-cli.phar and save it in our new directory. Now using Visual Editor IDE or anything you are comfortable with, create a new batch file and name it wp.bat for our alias.

    Save the following code on your wp.bat file:

    @ECHO OFF
    php "%~dp0wp-cli.phar" %*

    Set the variable Path in your local environment. Go over to System Properties -> Advanced System Properties -> Advanced. Click on the Environment Variables under the System Variables and find the variable name Path. Add ;C:\WP-CLI and click save. Restart the bash interface you are using at the moment and type wp cli version.

    If you can see WP-CLI 2.x.x, then it means you have successfully installed WP CLI.

    Happy coding!

  • How to install WordPress Coding Standard on Ubuntu

    How to install WordPress Coding Standard on Ubuntu

    WordPress has a set of coding standards that you can use when you develop either plugins or themes. While it’s not mandatory, I highly recommend using it on your project. It will make your code more user friendly and relatively easy to maintain in the long run.

    I was a Windows user for a long time and recently switched to Ubuntu 20. When I tried to install WordPress Coding Standards, I struggled a few times since I’m new to the Linux OS. In this tutorial, I will show you step by step on how I did it on my end and hoping that this will help you out.

    First requirement: composer. I’m using this throughout my installation. You can check their documentation on how you install it in your system.

    Installation steps:

    1. Install PHP_CodeSniffer – This is the script that is responsible for tokenization of the PHP, CSS and Javascript code on your project that detects any code violation from the defined standard. By using a terminal in Linux, cd to your home directory and install PHP_CodeSniffer.
    $ cd ~/
    $ composer global require "squizlabs/php_codesniffer=*"
    1. Download WordPress Coding Standard – In my case, I would prefer to install this globally instead of per project. Make sure that you are still in your home directory in your terminal before starting. Executing the code below will clone the repository and rename it wpcs.
    $ git clone -b master https://github.com/WordPress/WordPress-Coding-Standards.git wpcs
    1. After you have downloaded the WordPress Coding Standard, we need to set this on your local path. Now this is the part where I have struggled before so make sure you follow exactly to avoid the mistakes I’ve made.
    $ sudo phpcs --config-set installed_paths /home/username/wpcs

    Noticed the username? That would be the username of your current account. You should see this path when you go to Files -> Home, then press CTRL + L. You can verify if you have working sniffers by using phpcs -i.

    PHPCS values

    After you have confirmed that WordPress Coding Standard is added to your setup, we can now install the extensions we need for the Visual Studio Code. There are tons of similar extensions that are currently available, but these are the extensions that I am using and proven to be working.

    Phpcbf by Per Soderlind and phpcs by Ioannis Kappas

    Installations of these extensions are pretty much straightforward. Once you have done that, we are going to configure the settings. I would personally recommend that we set this up globally instead of per workspace. This will save you repetitive configuration, however if you prefer per workspace setup, you can copy the same settings from below as well.

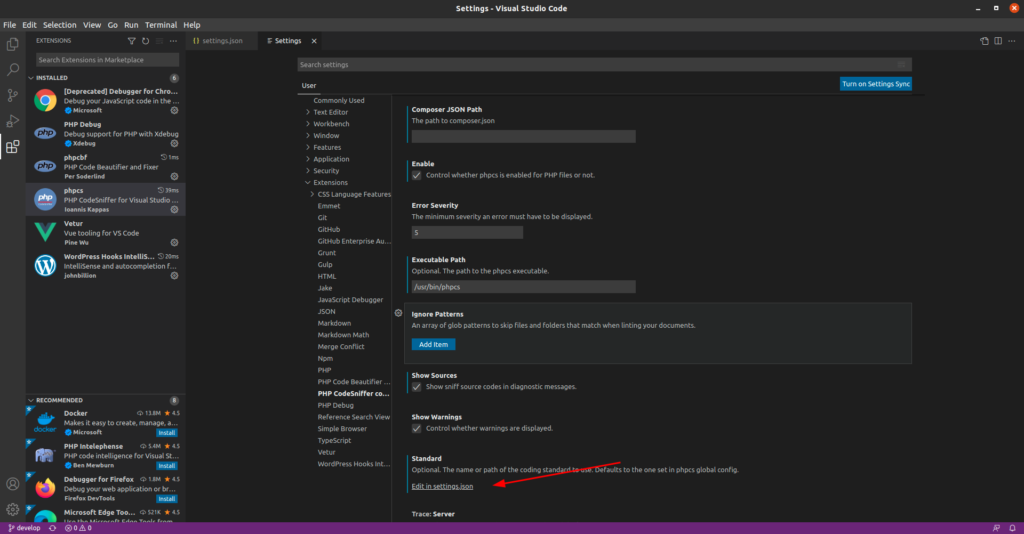
    Restart your Visual Code Editor, then go to File -> Preferences -> Settings -> Extensions -> PHP CodeSniffer configuration. Scroll down a bit until you see Edit in settings.json as shown below.

    Click that link and add the following:

    {
       "phpcs.enable": true,
       "phpcs.executablePath": "/path/to/phpcs",
       "phpcs.standard": "WordPress",
       "phpcbf.enable": true,
       "phpcbf.documentFormattingProvider": true,
       "phpcbf.onsave": true,
       "phpcbf.executablePath": "/path/to/phpcbf",
       "phpcbf.standard": "WordPress",
       "phpcs.showSources": true,
    }

    Now, open a terminal then go to your home directory then we need to determine the paths for phpcbf and phpcf that we need for the configuration.

    $ cd ~/
    $ which phpcs
    $ which phpcbf

    Copy the path of both tools and put them on the executablePath value respectively. Save and restart your Visual Code Editor. By this moment, you should be able to have the tools working. Open a sample PHP file and add your code, then when you click CTRL + S, it will sniff your code by default and phpcbf will auto format your code.

    Let me know in the comment section if you find this tutorial useful or if you have any questions.

    Happy coding!